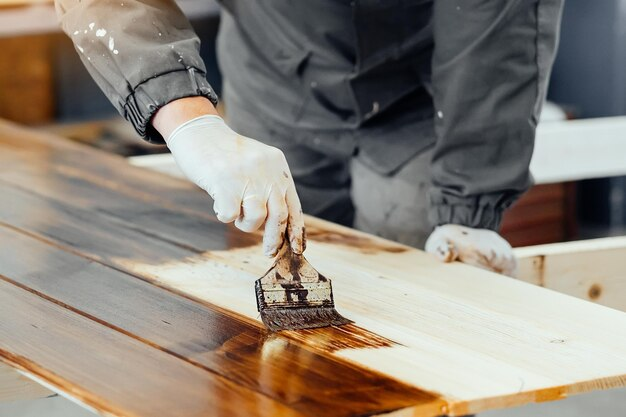
Reviving the beauty of wood through restoration and refinishing is a gratifying endeavor that can transform tired pieces into cherished focal points. Whether it’s an heirloom dresser, vintage dining table, or worn hardwood floors, the process to restore a finish requires careful attention and the right tools. This guide dives into the essential steps and techniques to effectively restore and refinish wood surfaces, providing insights and practical advice.Wood restoration involves more than mere cosmetic enhancements; it’s about uncovering the inherent character and natural allure of the material. By breathing new life into weathered or aged wood, you can reclaim its original splendor and ensure its longevity for years to come. From sanding away imperfections to applying the perfect finish, each stage of the restoration process contributes to the final result.
Whether you’re a seasoned DIY enthusiast or a first-time restorer, this guide will equip you with the knowledge needed to undertake your project confidently. Discover the transformative power of restoration and witness how it can revitalize your living spaces. Let’s delve into the world of home remodeling and refinishing and learn how to restore a finish with skill and finesse.
Guide to Restore and Refinish Wood Surfaces
Assessment and Preparation
Before diving into the restoration process, assess the condition of the wood surface you intend to restore. Identify any damages, scratches, or worn areas that require attention. Here’s how to get started:
Clean the Surface
Start by cleaning the wood surface using a mild wood cleaner or a mixture of water and vinegar. This step is crucial to restore a finish as it removes built-up dust, dirt, and grime that can detract from the wood’s natural beauty. Use a soft cloth or sponge to gently scrub the surface, ensuring thorough cleaning before proceeding with the restoration process.
Inspect for Damage
Carefully inspect the wood for scratches, gouges, or water stains. Note areas that need repair before proceeding with refinishing.
Repair Damages
Fill in scratches and gouges with wood filler or putty. Allow it to dry completely, then sand the repaired areas until smooth.
Stripping the Old Finish
If the wood has an existing finish, you’ll need to strip it off to reveal the bare wood underneath. Use these steps for effective stripping:
Choose the Right Stripping Method
To restore a finish effectively, choose the appropriate stripping method based on the type of existing finish. For paint, varnish, or stain, chemical strippers are generally effective. They efficiently break down the finish for removal. However, for stubborn or thick coatings, sanding may be necessary to fully restore the wood surface. Select the method that suits the specific finish to achieve the best restoration results.
Apply the Stripper
Follow the manufacturer’s instructions to apply the stripping agent evenly over the wood surface. Allow sufficient time for the stripper to soften the finish.
Remove the Old Finish
Use a scraper or putty knife to gently lift off the softened finish. Work in sections and be careful not to damage the wood underneath.
Clean the Surface
Once the old finish is removed, clean the wood thoroughly to remove any residue from the stripping process. Use mineral spirits or denatured alcohol to wipe down the surface.
Sanding and Smoothing
After stripping the old finish, sanding is essential to restore a smooth and even surface for refinishing. Follow these sanding tips to ensure optimal results: Use the right sandpaper grits, sand along the wood grain, and remove dust between sanding stages to restore a finish effectively.
Choose the Right Sandpaper
Start with coarse-grit sandpaper (e.g., 80-120 grit) to remove imperfections and old stain. Progress to finer grits (e.g., 150-220 grit) for a smoother finish.
Sand Along the Grain
When working to restore a finish, it’s crucial to sand in the direction of the wood grain to prevent scratches and swirl marks. Sanding against the grain can damage the wood fibers and create uneven surfaces. By following the natural direction of the grain, you ensure a smoother and more uniform finish. Take care to maintain consistent sanding strokes along the wood grain for optimal results in the restoration process.
Remove Dust
During the restoration process, between sanding stages, it’s essential to remove dust particles from the wood surface to ensure a clean and smooth finish. Use a tack cloth or a vacuum with a brush attachment to carefully eliminate any debris before proceeding to the next sanding step. This step helps prevent imperfections and ensures that the surface is properly prepared for the next phase of refinishing.
Staining or Painting
Once the wood surface is prepped and smooth, you can apply a fresh coat of stain or paint to enhance its appearance:
Choose the Right Finish
When preparing to restore a finish, choose a stain or paint that enhances the natural beauty of the wood and aligns with your desired aesthetic. Test the color on a small, inconspicuous area of the wood surface before applying it more broadly. This test ensures that the chosen color complements the wood species and achieves the desired look once fully applied.
Apply Evenly
Use a brush, foam applicator, or cloth to apply the stain or paint evenly. Work in small sections to avoid streaks or blotches.
Allow to Dry
Adhere to the manufacturer’s recommended drying time between coats when restoring a finish. This ensures optimal adhesion and durability of the sealant or finish. Apply additional coats as necessary to achieve the desired depth of color and protection. Avoid rushing this process, as proper drying time is essential for a professional and long-lasting result.
Sealing and Protecting
To preserve the newly refinished wood surface and protect it from damage, apply a protective sealant:
Choose the Right Sealant
When choosing a finish to restore a finish, consider options like polyurethane, lacquer, or wax. Each has unique characteristics in terms of durability and sheen. Polyurethane provides strong protection but can be glossy. Lacquer offers a durable and glossy finish. Wax provides a softer, more natural sheen. Choose based on the level of durability and shine you desire for your restored wood surface.
Apply Thin Coats
Use a brush or applicator pad to apply thin, even coats of the sealant. Allow each coat to dry completely before applying the next.
Sand Between Coats
To achieve a smooth finish when restoring a finish, lightly sand the surface between coats of sealant using fine-grit sandpaper. This step helps to remove imperfections, bubbles, or dust particles that may have settled on the surface during application. After sanding, wipe the surface clean with a tack cloth before applying the next coat of sealant. This technique ensures a professional-looking result.
Final Touches
Once the sealant is dry, inspect the wood surface for any imperfections or uneven areas. Make any necessary touch-ups, and then admire your beautifully restored woodwork!
In conclusion, embracing the challenge of restoring and refinishing wood surfaces can yield remarkable transformations in your living or working environment. With the right approach and tools, you can uncover the inherent charm and durability of wood, enhancing both aesthetics and functionality. For more intricate or valuable pieces, consider entrusting the task to a professional service like Hollywood Refinishing, which specializes in furniture and antique restoration. Contact us today to explore how we can help restore a finish to your cherished wood pieces, ensuring they shine with renewed splendor and longevity. Revitalize your space and indulge in the timeless beauty of well-preserved wood—every investment in restoration is an investment in lasting appeal and satisfaction.
Frequently Asked Questions
1. How long does it take to restore a finish on wood surfaces?
The time required for wood restoration depends on the size of the project and the extent of repairs needed. Generally, a small piece of furniture may take a few days, while larger surfaces like hardwood floors could take a week or more.
2. Can I restore a finish on antique wood furniture without damaging its value?
Yes, it’s possible to restore a finish on antique furniture while preserving its value. Seek professional advice if you’re uncertain, as improper restoration techniques can diminish its antique appeal.
3. What tools are essential for restoring a wood finish?
Essential tools for wood restoration include sandpaper (various grits), wood filler, stripping agents, brushes or applicators for stain or paint, and protective sealants like polyurethane.
4. How do I know if I should stain or paint my wood surface?
The choice between staining and painting depends on personal preference and the condition of the wood. Staining enhances the natural wood grain, while painting can provide a uniform color and finish.
5. Is wood refinishing suitable for DIY projects?
Yes, wood refinishing can be a rewarding DIY project with the right tools and techniques. However, complex or valuable pieces may benefit from professional restoration services.
6. How do I maintain a newly refinished wood surface?
To maintain a refinished wood surface, avoid placing hot items directly on it and use coasters under beverages. Regularly dust and clean with a damp cloth to preserve its appearance.
7. What should I look for in a professional wood restoration service?
When choosing a professional wood restoration service, consider their experience, expertise in handling different wood types, customer reviews, and commitment to quality craftsmanship. Ensure they use safe and environmentally friendly practices in their restoration process.


