If you’re preparing to give your home a fresh look by painting the walls, ensuring your drywall is properly prepped is essential for a smooth and beautiful finish. This comprehensive guide will take you through the necessary steps to get your drywall ready for painting, covering everything from cleaning to repairing imperfections. By following these best practices, you’ll be able to achieve professional-quality results and ensure that your new coat of drywall paint looks flawless and lasts for years to come.Proper preparation of your drywall surfaces is the foundation for a successful paint job. Before you pick up a paintbrush, it’s important to clean the walls thoroughly to remove dust, dirt, and any other contaminants that could affect the paint’s adhesion. Additionally, inspect the walls for any imperfections, such as holes, cracks, or dents, and make the necessary repairs using appropriate materials. Taking the time to properly prepare your drywall will not only enhance the appearance of your painted walls but also contribute to the longevity of the finish.
Whether you’re tackling a small room or repainting your entire home, this guide will equip you with the knowledge and techniques needed to prepare your drywall surfaces effectively. Let’s dive into the step-by-step process of cleaning and repairing drywall to ensure a flawless application of paint during home refinishing.
Best Guide to Cleaning and Repairing Drywall
What is Drywall?
Drywall, also referred to as gypsum board or sheetrock, is a prevalent construction material utilized for interior walls and ceilings. It comprises a gypsum core encased between layers of paper, delivering a consistent and even surface suitable for painting with drywall paint.
Guide to Cleaning Drywall Surfaces
Before beginning repairs or painting, it’s crucial to thoroughly clean drywall surfaces to remove dust, dirt, and contaminants that could affect paint adhesion. Use a dry microfiber cloth or vacuum with a brush attachment to clear away debris and cobwebs. For soiled areas, gently wash with mild dish soap and water, then ensure the surface is fully dry before applying drywall paint.
Dust Removal
Begin by gently dusting the walls using a dry microfiber cloth or a broom to eliminate loose debris and cobwebs. This initial cleaning step is crucial before applying drywall paint, as it ensures a clean and smooth surface for optimal paint adhesion. Focus on thorough dust removal to achieve professional-quality painting results.
Vacuuming
Utilize a vacuum cleaner equipped with a brush attachment to thoroughly clean corners, baseboards, and ceilings. This method effectively captures fine dust particles that may be overlooked during regular dusting. Prioritize this step before applying drywall paint to ensure a clean and smooth surface for optimal paint adhesion.
Washing
To tackle heavily soiled areas or stains on drywall surfaces before painting, use a solution of mild dish soap and warm water. Gently scrub the affected areas with a sponge or soft cloth, then rinse thoroughly with clean water. This cleaning method effectively removes dirt and stains, ensuring a clean and smooth surface for drywall paint application.
Allow to Dry
Give the walls ample time to dry completely before proceeding with repairs or painting. Adequate drying prevents moisture from affecting paint application.
Guide to Repairing Drywall Imperfections
After cleaning, thoroughly inspect the drywall for any imperfections that require repair before applying drywall paint. Common issues to look for include small holes, cracks, or dents. Use spackling compound or joint compound to fill small holes and cracks, then sand the repaired areas smooth. For larger holes or damage, use a drywall patch or mesh tape before applying joint compound. Properly addressing these imperfections will ensure a flawless and professional finish when painting your drywall surfaces.
Small Holes and Cracks
Use spackling compound or lightweight joint compound to fill small holes and cracks. Apply the compound with a putty knife, then smooth it out and let it dry completely.
Large Holes
For larger holes or damage, use a drywall patch or mesh tape to cover the area. Apply joint compound over the patch, feathering the edges for a flawless finish.
Sanding
After allowing the compound to dry, use fine-grit sandpaper to smooth the repaired areas for drywall painting. Wipe away dust using a tack cloth or a damp sponge to ensure a clean and pristine surface before applying paint. This preparation step is crucial for achieving a professional and flawless finish on your drywall.
Priming
For repaired areas and bare drywall patches, apply a coat of primer to ensure uniform paint absorption and hide imperfections.
Tips for Successful Drywall Painting
After cleaning and repairing your drywall surfaces, follow these tips for a successful painting project
Use High-Quality Paint
Choose high-quality drywall paint and painting supplies to achieve superior coverage and durability. Investing in premium products ensures a smoother application and longer-lasting results, enhancing the overall appearance and longevity of your painted surfaces.
Apply Multiple Coats
For optimal results, apply two coats of drywall paint, ensuring each coat dries completely before applying the next layer. This method enhances coverage and durability, resulting in a smooth and flawless finish on your walls.
Use Proper Techniques
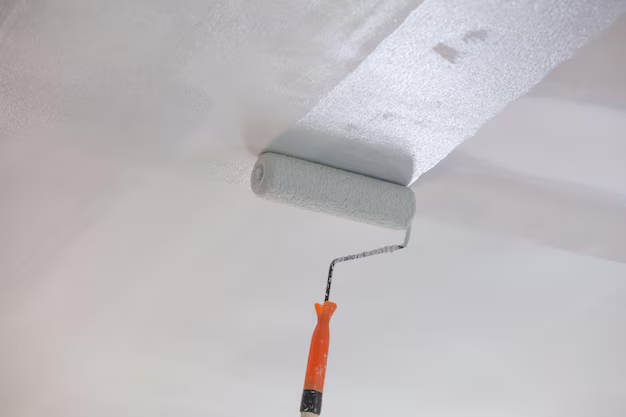
Use a roller for large wall areas and a brush for edges and corners. Work in sections and maintain a wet edge to avoid visible brush or roller marks.
Allow Adequate Drying Time
Follow the paint manufacturer’s instructions for drying time between coats and before moving furniture back into the room.
In conclusion, ensuring your drywall surfaces are properly prepared before painting is crucial for achieving professional-quality results. By following the steps outlined in this guide for cleaning and repairing your drywall, you’ll create a smooth and flawless canvas that enhances the beauty of your paint project. At Hollywood Refinishing, we specialize in drywall painting and offer expert remodeling services to transform your home. Contact us today to discover how our services can help you achieve your painting goals efficiently and affordably. Take the time to prepare your drywall surfaces with care and attention to detail, and you’ll enjoy the transformative impact of a fresh coat of paint on your living space. Prepare your walls thoughtfully, and let us assist you in bringing your vision to life with a professional finish that enhance the appearance and ambiance of your home. Inspired? Contact us now to learn more about drywall painting and home refinishing.
Frequently Asked Questions
1. How long does it take to clean and repair drywall before painting?
The time required depends on the size of the area and the extent of repairs needed. Generally, cleaning and basic repairs can be completed in a day or two for a standard room.
2. Can I skip cleaning the drywall before painting?
It’s essential not to skip cleaning before applying drywall paint, as dirt and contaminants can adversely affect paint adhesion and lead to an uneven finish. Properly cleaning the drywall surfaces ensures a smooth and durable paint application, enhancing the overall appearance and longevity of the painted walls.
3. What type of paint should I use for drywall?
Choose a high-quality interior latex paint formulated specifically for drywall surfaces. Eggshell or satin finishes are ideal for most interior walls.
4. How do I repair larger holes or damage in drywall?
For larger holes, use a drywall patch or mesh tape with joint compound to create a smooth surface suitable for drywall paint. Allow each layer of joint compound to dry completely before sanding and applying paint to ensure a flawless finish.
5. Should I prime the entire wall before painting?
While it’s not necessary to prime the entire wall if it’s in good condition, priming is essential for repaired areas and bare drywall patches to ensure uniform paint absorption and hide imperfections.
6. How can I avoid visible brush or roller marks when painting drywall?
When painting, work in small sections and maintain a wet edge to prevent visible brush or roller marks. Use a roller for large areas and a brush for edges and corners, applying drywall paint evenly and smoothly for a professional finish.
7. How long should I wait before applying a second coat of paint?
Follow the paint manufacturer’s instructions for drying time between coats. Generally, allow the first coat to dry completely before applying the second coat, which may take a few hours to overnight.


